Ubuntu UEFI Minimal Install
I consider myself an intermediate Linux user, but I still like using Ubuntu. Ubuntu has a reptutation for begin a “beginner’s distro”, but as I’ve described in a previous post on Linux distributions, Ubuntu satisfied several key criteria for me:
- Extensive Community Support: It’s very easy to find answers to questions and solutions to issues, thanks to a very large community of users.
- Scalable: I use Ubuntu at work (through WSL), on my web server, and now on my desktop and laptop. It was easy to set it up with the same configuraiton on all of these platforms.
- Simple Installation: It’s easy to setup. At the end of the day, whether I’m working on time-sensitive analysis at work or trying to maximize my productivity at home, I just don’t want to spend hours debugging issues with drivers or dependencies or conflicting libraries and packages.
That all being said, when I first configured Ubuntu on my desktop, I ended up with over 3000+ packages and 30GB of space used on my SSD.
For me, most of this is just “bloatware”: software that I don’t need, and/or will probably never use, and/or will not miss if it’s gone.
Realizing this, I became interested in building a minimal Ubuntu installation with only the packages I absolutely need. Ubuntu offers a minimal ISO for installing a barebones version of Ubuntu Linux. However, it is only capable of BIOS boot - not UEFI. For users with UEFI systems, like me, you’ll need to create your own ISO combining elements of the Ubuntu minimal ISO and the Ubuntu server ISO.
Building the ISO
To start, we need to:
- Obtain the Ubuntu Minimal ISO
- Obtain the Ubuntu Server ISO
- Copy some dependencies from Ubuntu Server -> Ubuntu Minimal
- Create a new ISO
Luckily, these three steps are fairly easy with the following script from noobient.com.
Note: the script below is based on Ubuntu 18.04.2 Bionic Beaver. You may need to modify this script if you wish to use a newer version of Ubuntu.
#!/bin/bash

set -eu

server_iso='ubuntu-18.04.2-server-amd64.iso'
mini_iso='mini.iso'
dist_dir='ubuntu-18.04-netinstall'

if [ ! -e ${server_iso} ]
then
    wget "http://cdimage.ubuntu.com/releases/18.04/release/${server_iso}"
fi

if [ ! -e ${mini_iso} ]
then
    wget "http://archive.ubuntu.com/ubuntu/dists/bionic-updates/main/installer-amd64/current/images/netboot/${mini_iso}"
fi

rm -rf ${dist_dir}*
7z x ${server_iso} -o${dist_dir}-tmp install/hwe-netboot/ubuntu-installer/amd64/linux
7z x ${server_iso} -o${dist_dir}-tmp install/hwe-netboot/ubuntu-installer/amd64/initrd.gz
7z x ${server_iso} -o${dist_dir} EFI
7z x ${mini_iso} -o${dist_dir}
mv ${dist_dir}-tmp/install/hwe-netboot/ubuntu-installer/amd64/linux ${dist_dir}/linux
mv ${dist_dir}-tmp/install/hwe-netboot/ubuntu-installer/amd64/initrd.gz ${dist_dir}/initrd.gz
zip -r ${dist_dir}.zip ${dist_dir}
After running this script, you’ll have a directory called ubuntu-18.04-netinstall
with all of the files we need to build a bootable ISO.
To make the ISO, use the mkisofs command.
Note: If you’re using macOS, you’ll need to install the cdrtools package to
get mkisofs. You can install this brew install cdrtools.
If you’re on Windows, you can install cdrtools in Cygwin or search the Internet
for mkisofs Win32 binaries.
mkisofs -o ubuntu-18.04-netinstall.iso \
        -b ubuntu-18.04-netinstall/isolinux.bin
        -c ubuntu-18.04-netinstall/boot.cat \
        -no-emul-boot \
        -boot-load-size 4 \
        -boot-info-table -J -R -V \
        UbuntuMinimal .
This should create an ISO called ubuntu-18.04-netinstall.iso which can be used to boot.
Boot the Ubuntu Minimal Installer
The next steps:
- Boot from the bootable medium (USB, CD, whatever you wrote the ISO to)
- Start the Ubuntu Installer
Plug in the USB to your machine and boot from it. Depending on what screen you see upon booting, follow the steps below.
GRUB Bootloader Menu
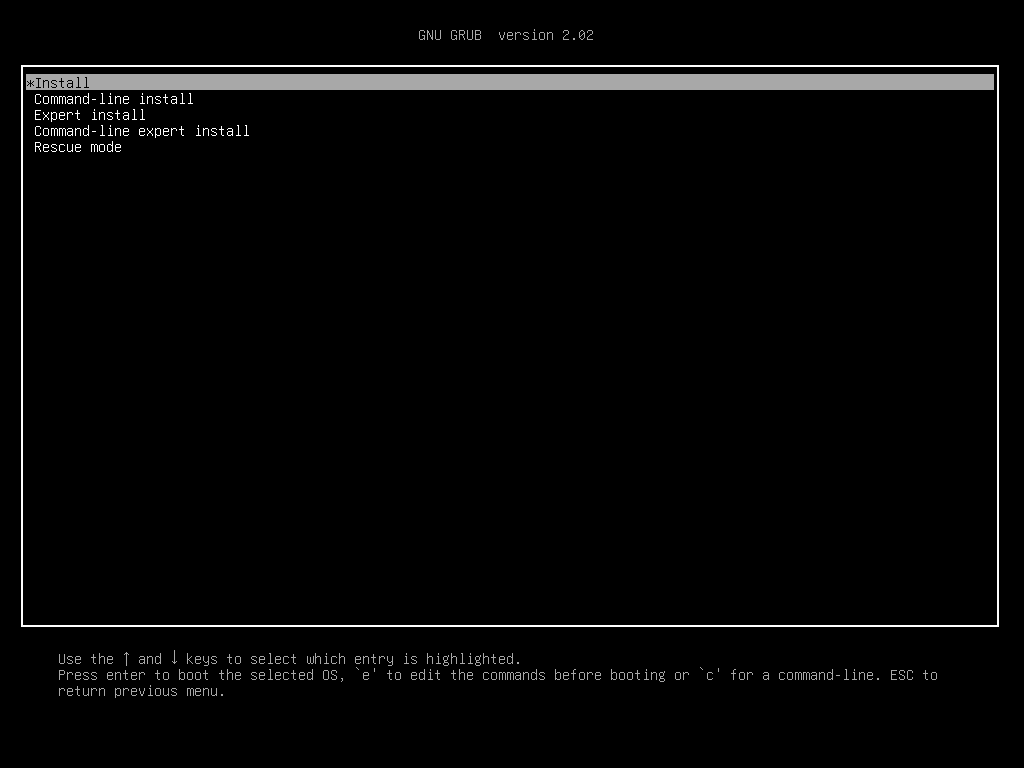
If you boot and land at the menu pictured above, great! Select Install and skip to the next section: Install Ubuntu.
UEFI Interactive Shell
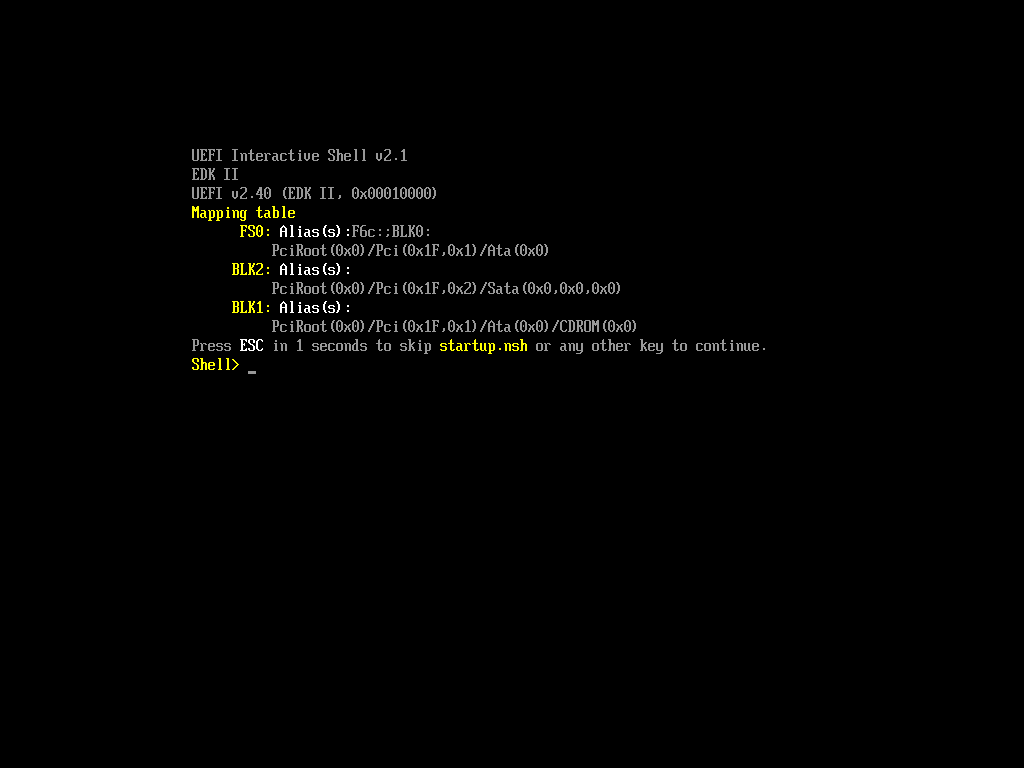
If you boot and land at the menu pictured above, still great! We just have a few steps before we can start the installer.
The ISO we created uses the GRUB bootloader to launch the Ubuntu installer, so we’ll need to:
- Start the GRUB terminal
- Boot the Ubuntu Installer manually
The following commands will mount the boot medium’s filesystem and start the GRUB terminal.
fs0:
EFI\BOOT\grubx64.efi
You should now be at the GRUB terminal.
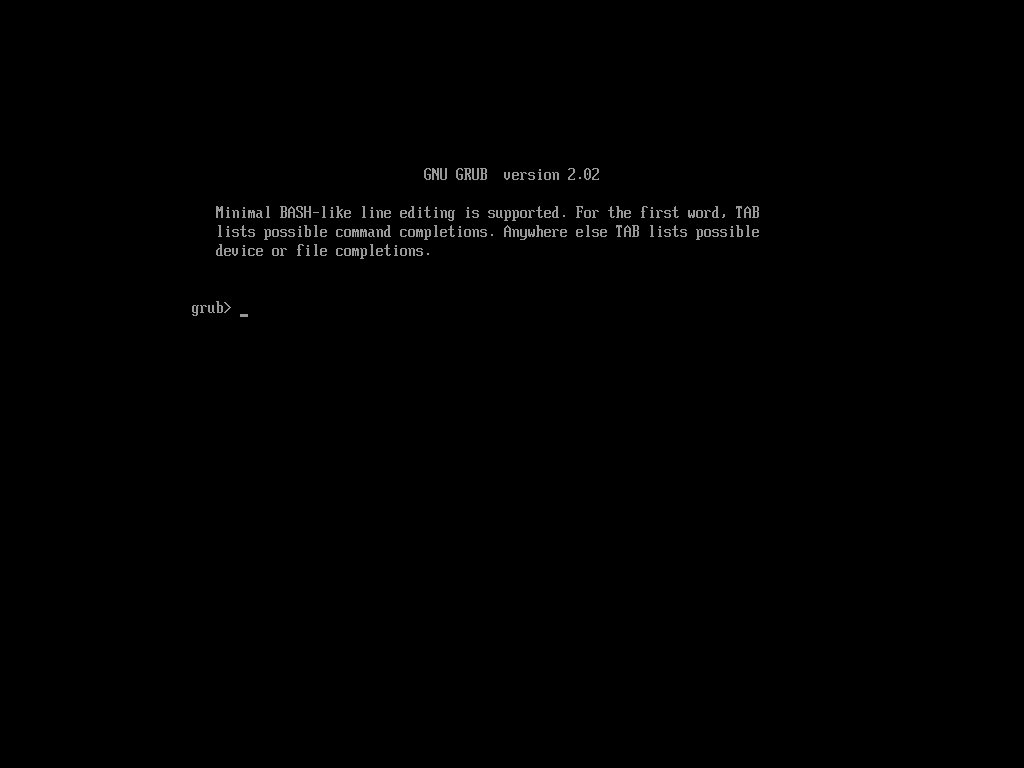
You will need to identify the filesystem of your boot medium. Use the ls
command to see all the filesystems connected to your machine.
ls
My output looks like this
# (memdisk) (hd0) (cdr0)
I have one HDD and one CD-ROM drive connected so I see an entry for each. You
don’t need to worry about (memdisk) or any other entries.
My bootable medium is the CD-ROM drive (crd0), so I will enter the following
commands.
set root=(cdr0)
linux /linux
initrd /initrd.gz
boot
Depending on where the files linux and initrd.gz are located, you might need
to modifiy the paths of these files.
After you run this, your system should boot the Ubuntu Minimal installer in UEFI mode.
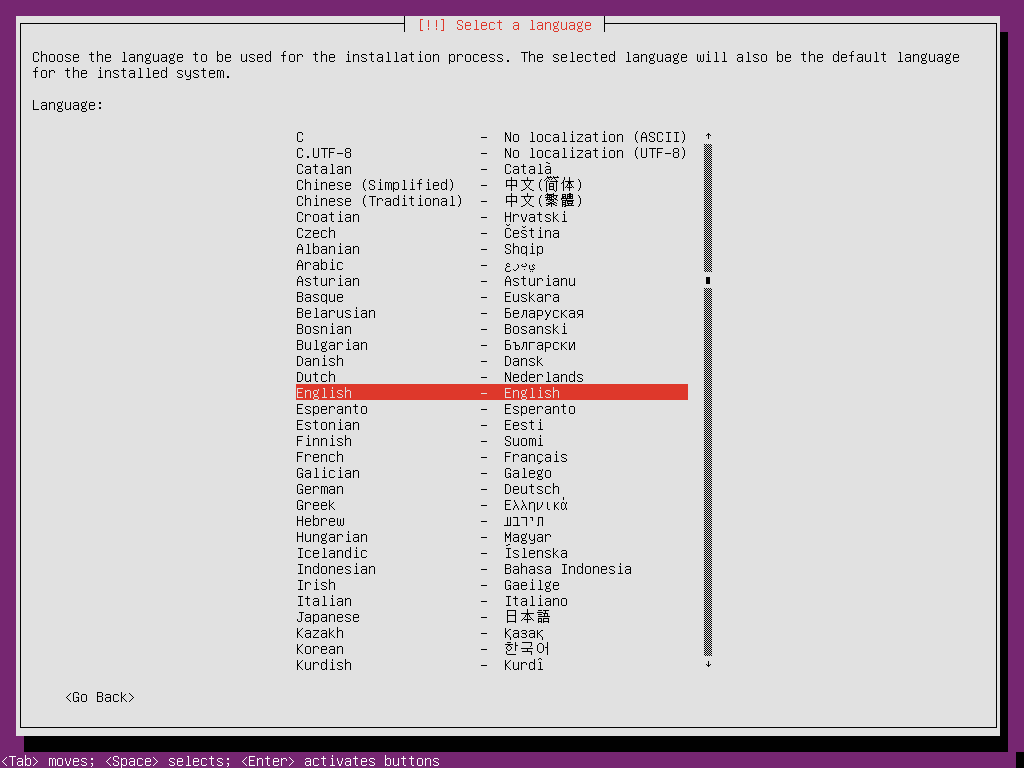
Install Ubuntu
The Ubuntu installer walks you through the installation process step-by-step, so I won’t go through it in its entirety here. However, there are two important steps that are worth mentioning if you are looking for a truly minimal installation.
The first is the step for partitioning disks, as seen below.
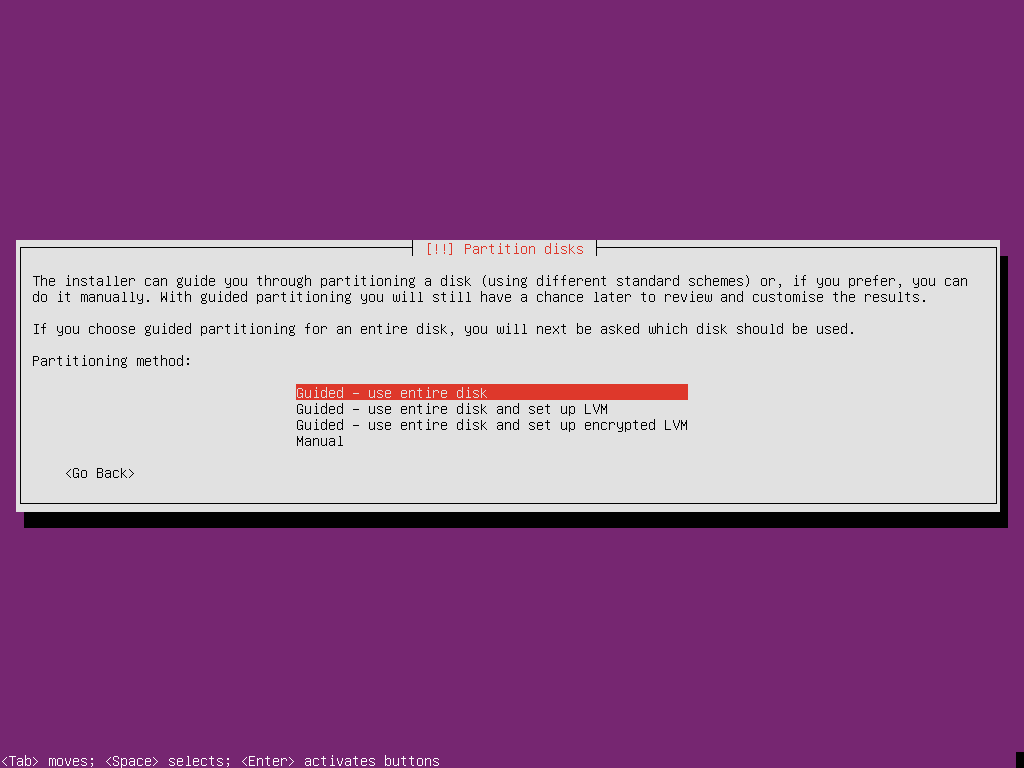
I recommend selecting Guided - use entire disk. You should select this option unless you understand LVM and or/are hellbent on using it.
If you select the aforementioned option and select your disk, you should see a screen which looks like this:
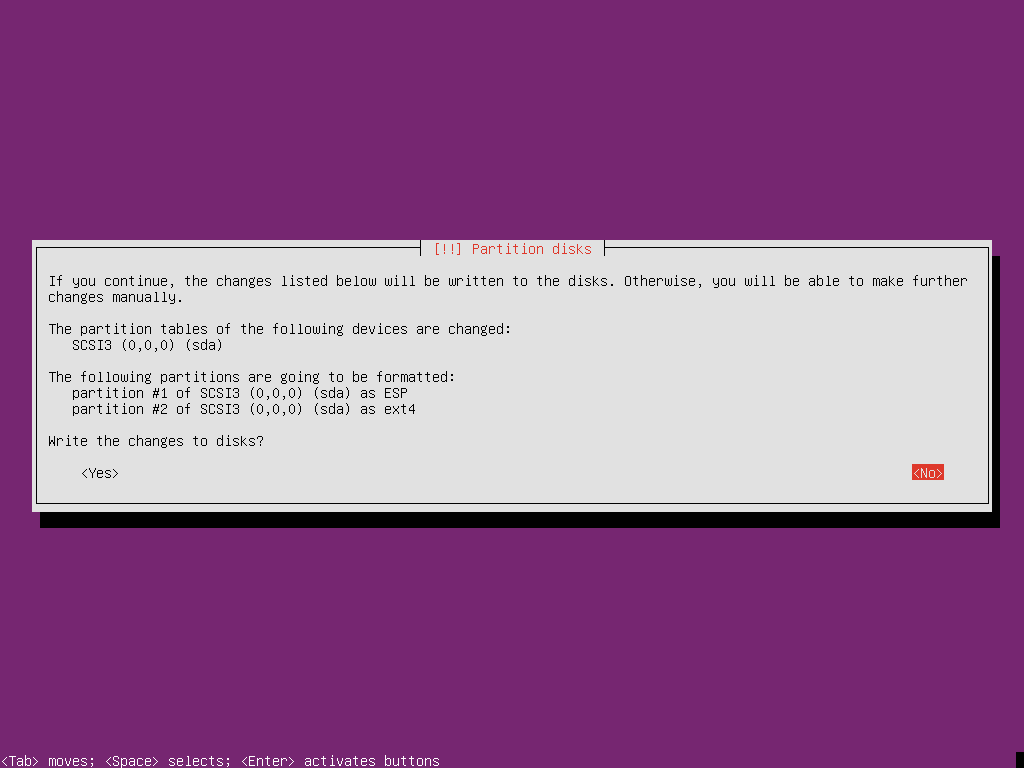
This will create two partitions on your drive - one as ESP (EFI System Partition) and one as ext4 (main Linux filesystem). Select OK here and you’re good to go.
The second step you should pay attention to is the Software selection step. You’ll be presented with a menu which looks like this:
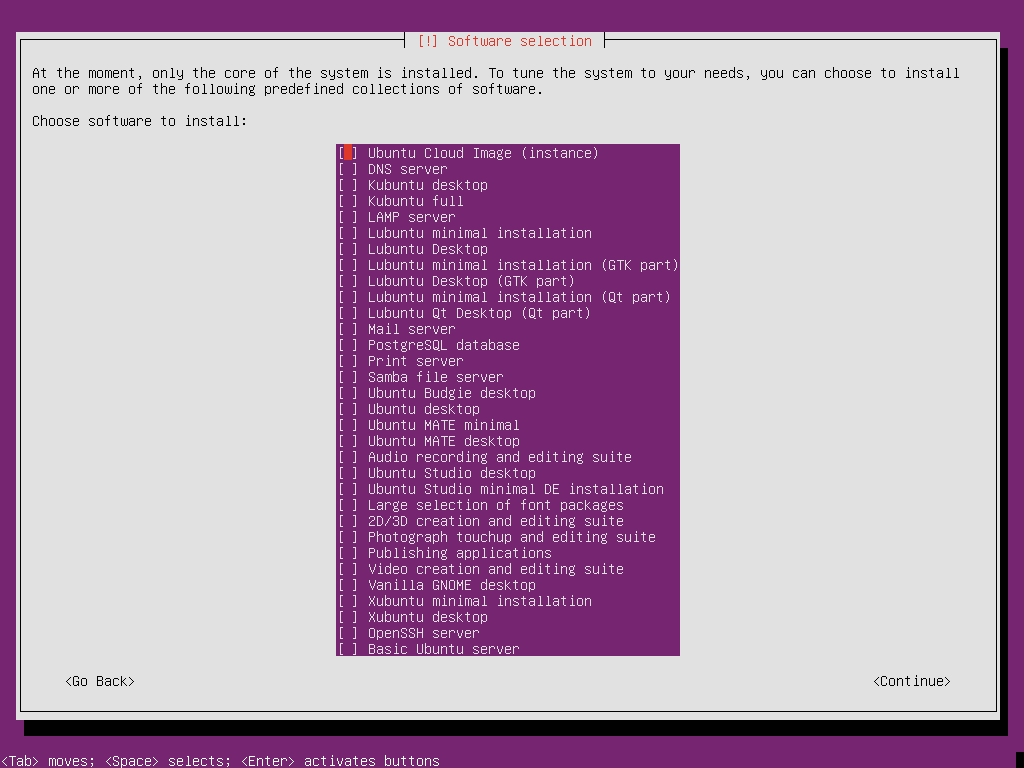
This menu allows you to install pre-defined collections of software. For a truly minimal Ubuntu installation, you will configure all these manually. Thus, don’t select anything. Instead press tab and select Continue.
Boot Ubuntu
If all goes well, you should be prompted to restart your computer and remove the install medium. Do this and you should reach the Ubuntu tty1 login page:
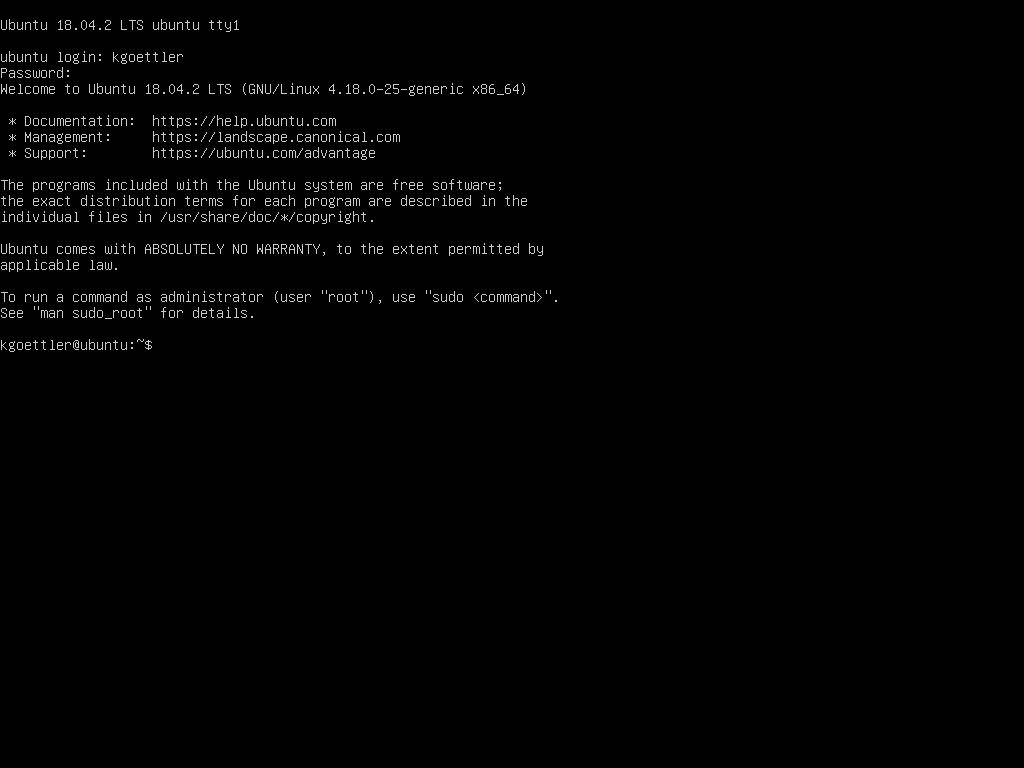
With this your minimal Ubuntu system is complete - congratulations!
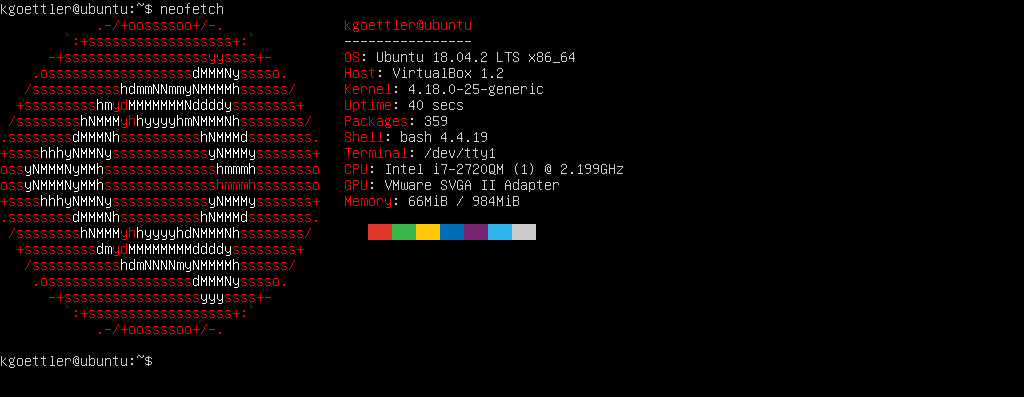
Only 359 packages - nice! This is essentially the bare minimum packages that you need for a functional Ubuntu system. Now that it’s installed, you can begin to configure the system exactly as you’d like.
I configured my system with my essential terminal applications
(vim, tmux, st, etc.) and setup a minimal GUI based on i3-gaps,
compton, and polybar. You can read about that in my next post.